How To Turn A 7 Into A 10.
Way back in the 80's I remember seeing a picture of what I thought was the perfect knife in a Smoky Mountain Knife Works catalog. It was the Becker BK2. I could not afford one and years and years went by and I finally found myself in the SMKW store. Having completely forgotten about the BK2, I walked around looking at all sorts of stuff. Well, it must have been divine intervention, because I stumbled upon the Becker Knives section. They were still being made in Camillus, NY. For the very first time, I saw the BK2. Holy Crap was it is a big knife. I'd never seen a knife like it before. Especially one that was 1/4" thick. My initial thought was that it was too much knife and too heavy. So I passed on it. They did have the BK10 Crewman, but I was not really a fan of the thumb ramp and actually left the store empty-handed. Can you imagine that...empty handed.
Fast forward about 15 years and I re-stumbled upon Becker, thanks to the internet. Before I knew it, I had purchased a KaBar made BK2. It sure is a beast and after having fun with a couple modifications, decided that it was a real "keeper". But, I still was struggling with the weight of it. This little-rekindled love affair with the BK knives prompted me to drive to Camillus and look at the old factory. How sad a day it was. I can't even describe what it was like. Anyway, I got home and instantly searched for a BK10. Low and behold, KaBar was not making that version, but there were still some Camillus versions floating around. So I bought two. One to use, one to put in the display case. After I received them, I thought to myself that I was a fool to use this knife as it was irreplaceable to an extent and there had to be an alternative. I liked the blade size of the BK2, but the thickness of the BK10 and the hight grind. And, since I was going to be making my own, I could eliminate the thumb ramp as well.
I decided that I really wanted one and came up with a plan to make my own out of a BK7. What follows is basically a little pictorial description of the process. You could do this without actually owning a BK10 to use for a template simply by grinding the blade to a 5 1/2" length. But I decided to use my Camillus BK10 as a template. This helped me with the fabrication of the false edge on top. Because my knife was vintage and no longer produced, I did not want to hurt it. But, I eventually got over it and now use it all the original all the time, and even modified the butt on it to round it making it more comfortable when chopping. I long since sold the one I made and had named it the Honey Badger.

Comparison of BK10 (top) and BK7 tips. They are very similar
with the BK7 sloping back just a little more than the BK10.

BK10 without handles.

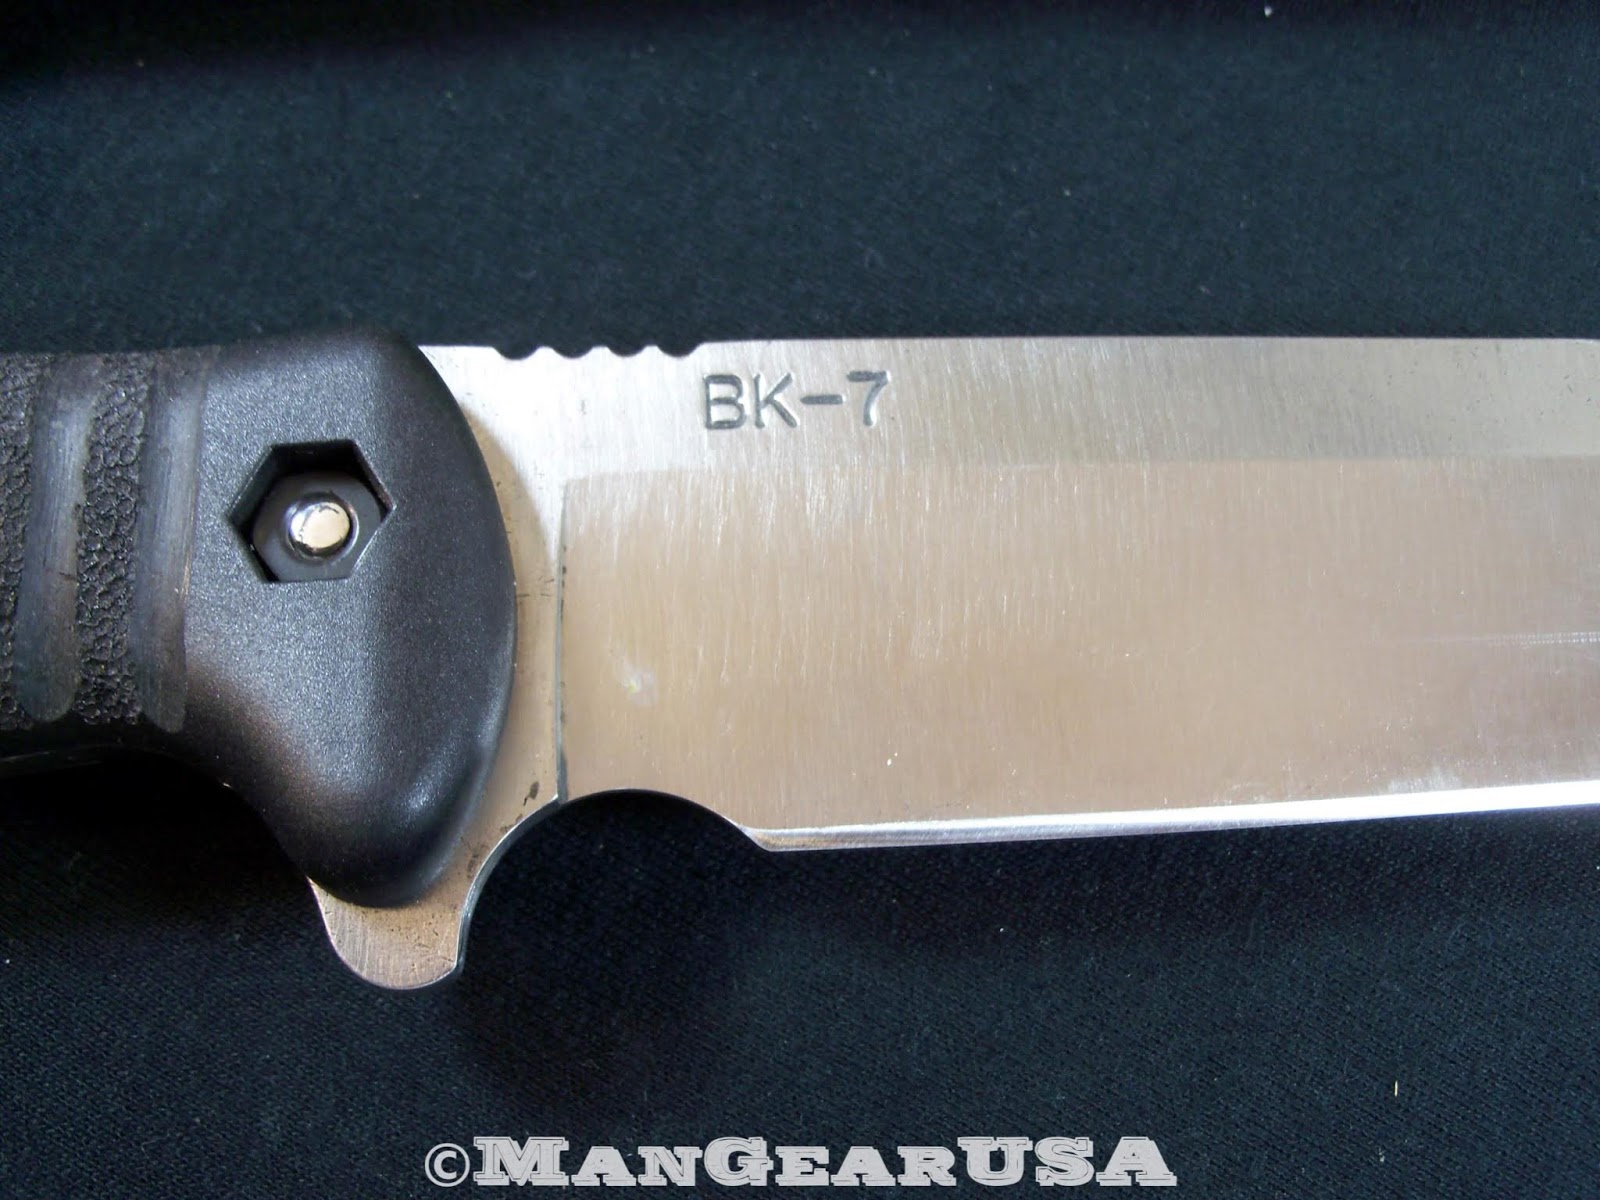
BK10 (top) BK7 ready for stenciling.


That was simple.

Decided to grind all the material away rather
than try to use a hacksaw to cut it. I was
very careful and proceeded very slowly and constantly
dunked the blade into very cold water.

Feel free to admire the grinder I made.

Finished with the profile grind.

Here comes the tricky part. I needed to mimic
the grind lines of the 10. So, rather than use
the grinder and possibly take off too much
at once. After beginning the initial bevel with the grinder,
I decided to use a very large and new
Bastard file. It surprisingly cut into the hardened
steel quite sufficiently.


Safety first. A little tape on the edge just so
I don't win a trip to the ER.


Starting to get to a decent thickness.

View of the top false grind. Looks pretty even. :-)

Another view.

Edge grind looks very consistent as well.

Using a much finer file now to reduce grind lines.


Not a fan of the stock ramp, so it is gone.
Leaving one last thumb notch from which
I will make several matching ones.


Making much more thumb-friendly notches.

Time to strip off that black coating.


The black that is left behind is very easily
scraped off with a vinyl tool.


Time to apply the "Randall Made Knives" inspired
surface finish to the blade.


After putting on a Hair Popping Edge, it is
time for a comparison. I'd say, other than
the removal of the thumb ramp, this is a dead ringer.


After using it in the field a bit, I decided that
I would really like a finger choil and custom
handle treatment as well.


Below are a few picture of it in the field, before I
opted for the finger choil you saw above.


Do I still have this knife?
I actually get asked that periodically. As much as I liked it and thoroughly enjoyed the process of making it and thrilled with the fact I actually took the time to document it, unlike many other of my projects I just dive into, I did sell it. Part of the reasoning behind that is I regretted adding the large finger choil, as it made the blade edge a little shorter and I preferred how the knife cut with me holding the handle only and using the blade right up to the plunge line. So, I decided that since I had two Camillus BK10's, why not relegate one to service. Glad I did. Those Camillus knives were amazing. Not to say the KaBar knives are not as good, and they should be because the same man who made them in Camillus was in charge of the engineering of them and heat treat in Olean. Paul Tsujimoto, or more widely known as Toooj on the Becker and KaBar forums. I just feel like I have a nice piece of history in my hand when I use it. The knife has of course been modified. I "softened" up the thumb ramp a smidge, removed the bottom finger guard so it is flush with the handle just like on the BK2. (this makes chopping things on a cutting board much easier) and I rounded the butt and put a Micarta handle on it that I re-shaped and added grooves to.
Kabar is still making these as far as I know. They are certainly worth looking into!!!
posted by Man Gear @ 11:19 PM
0 Comments
![]()

0 Comments:
Post a Comment
Feel free to comment.
Subscribe to Post Comments [Atom]
<< Home